Autumn in Canada brings crisp air, vibrant foliage, and a firm reminder that severe winter weather is right around the corner. From the blustery coastal winds of Atlantic Canada through the freeze-thaw cycles of Ontario and Quebec to the prairies and Western mountain valleys, Canadian homes face some of the most punishing cold-climate conditions in the world. Your siding serves as the primary shield against driving rain, heavy snowfall, and sub-zero temperature drops. Before the first major snowpack arrives, performing a thorough perimeter inspection is essential for keeping your home warm, dry, and structurally sound.
Taking time to winterize your building envelope pays massive dividends in long-term property preservation. Whether you are preparing your family home for deep winter or consulting a local real estate agent to position your property for a competitive spring market listing, a tight, pristine exterior wall assembly instills immediate confidence. Executing a structured autumn maintenance routine ensures that seasonal moisture cannot penetrate exterior cladding, freeze behind panels, or compromise interior wall insulation.
The Quick Edit
- Organic Debris Elimination: Wash away summer algae, mould spores, and trapped grime before freeze cycles lock moisture against exterior panel surfaces.
- Sealant & Joint Verification: Audit caulking around window frames, door trims, and corner posts to prevent wind-driven rainwater from infiltrating wall cavities.
- Lower Course Clearance: Clear soil, garden mulch, and leaf piles at least six inches away from starter strips to eliminate pest pathways and ground-level water wicking.
The Canadian Winter Challenge: Freeze-Thaw Mechanics and Expansion
Understanding why autumn maintenance matters requires examining the physical forces that act on Canadian home exteriors throughout winter. The primary threat to exterior cladding in northern latitudes is not just snow itself, but the relentless cycle of freezing and thawing.
During late autumn and early winter, daytime temperatures frequently hover slightly above freezing, allowing rain or melting snow to seep into hairline cracks, loose seams, or deteriorated caulking joints. As night falls and temperatures plunge well below 0°C, that trapped water freezes and expands by approximately nine percent in volume.
This repetitive expansion acts like a mechanical wedge. Over a single winter season, small unsealed cracks widen dramatically, popping panel fasteners out of framing studs, splitting brittle vinyl corners, and breaking adhesive bonds on caulking beads. Furthermore, heavy winter snowpacks piling against lower siding courses subject materials to prolonged moisture exposure. Ensuring your building envelope is entirely watertight before the ground freezes solid is the single most effective way to prevent catastrophic spring melt leaks.
Phase 1: Soft-Washing and Surface Decontamination
The first step in your fall siding protocol is removing accumulated organic material. Over summer and early autumn, dust, pollen, tree sap, and microscopic fungal spores settle onto panel lap edges and beneath overlapping seams. If left untreated over winter, trapped organic matter retains moisture against cladding surfaces, creating ideal conditions for mould and rot underneath snow accumulations.
Soft-washing is the safest and most effective way to clean exterior siding. Unlike high-pressure power washing—which easily forces water upward past panel laps and directly into interior wall sheathing—soft-washing uses a low-pressure garden sprayer paired with a specialized cleaning solution.
Mix a mild solution of warm water, biodegradable household detergent, and a small amount of oxygen bleach for stubborn mildew spots. Apply the solution from the bottom of the wall moving upward to prevent streaking, let it sit for five to ten minutes without drying, and scrub gently with a soft-bristle telescoping brush. Finish by rinsing thoroughly from the top down with a standard garden hose nozzle. This soft-wash process is essential for keeping your home’s exterior looking fresh the whole year while ensuring surfaces are clean for accurate visual inspection.
Phase 2: Inspecting Panel Fasteners, Joints, and Alignment
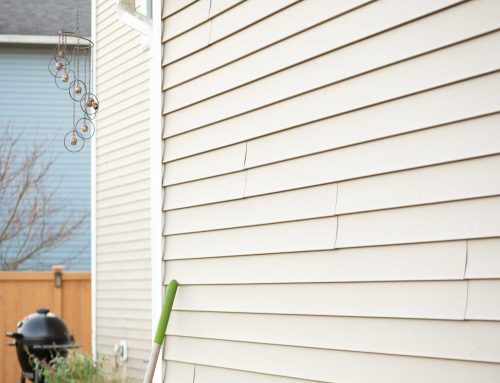
Once siding surfaces are clean and dry, conduct a close-up visual and tactile inspection around the entire home perimeter. Systematically walk the exterior, examining every wall elevation from foundation level up to the soffit line.
Look closely for physical irregularities that developed during summer heatwaves or early autumn windstorms:
- Vinyl and Composite Panels: Check for loose, sagging, or unclipped panels. Vinyl siding must be allowed to float horizontally on nails inside hem slots to accommodate thermal contraction during extreme cold snaps. Ensure panels have not bound tightly against corner posts or window casings.
- Fibre Cement Board: Inspect board edges for hairline chips, surface paint flaking, or unsealed factory-cut edges. Ensure bottom edges maintain required clearances above rooflines and concrete aprons.
- Wood Cladding: If your home features timber, investing in natural wood siding requires extra diligence during autumn checks. Inspect for cupping, loose finish nails, checking along grain lines, and deteriorating protective stain coats.
If you discover loose panels, re-secure them using appropriate corrosion-resistant stainless steel or hot-dipped galvanized fasteners. Never drive nails completely flush against vinyl hemlocks; leave a dime’s thickness gap so the material can contract smoothly as winter temperatures drop.
Phase 3: Auditing Perimeter Sealants and Flashing Integration
The vast majority of exterior water leaks do not occur through the middle of siding panels; they occur at penetration interfaces where siding meets doors, windows, light fixtures, hose bibbs, and rooflines. Perimeter caulking and metal flashing form the critical seal at these vulnerable transition points.
Inspect all caulking beads surrounding window trims, door casings, corner posts, and dryer vents. Exposure to UV light and temperature shifts causes standard acrylic caulking to dry out, harden, and shrink over time, leaving hairline gaps between the cladding and trim.
Scrape away any cracked, peeling, or hardened caulk using a putty knife. Clean the joint thoroughly with rubbing alcohol to remove residual dust and oil. Apply a fresh bead of high-performance 100% polyurethane or elastomeric silicone caulk, smooth it with a joint tool, and allow it to cure fully before freezing temperatures arrive.
Next, inspect metal z-flashing above horizontal window trims and sliding door headers. Ensure drip edges are clear of accumulated leaves or roof grit, allowing water to drain outward away from the wall assembly rather than backing up behind the trim.
Phase 4: Ground Clearance, Starter Strips, and Pest Defence
The lower edge of your siding assembly faces the highest risk of moisture degradation and pest intrusion. As autumn leaves accumulate and garden beds are prepped for winter, soil and mulch often get pushed up against lower siding courses.
Maintain a strict minimum clearance of six inches between the bottom edge of your siding and surrounding soil or garden mulch (and two inches above hard surfaces like concrete walkways or stone patios). Direct contact with wet soil creates a capillary bridge that wicks groundwater straight up into wall framing.
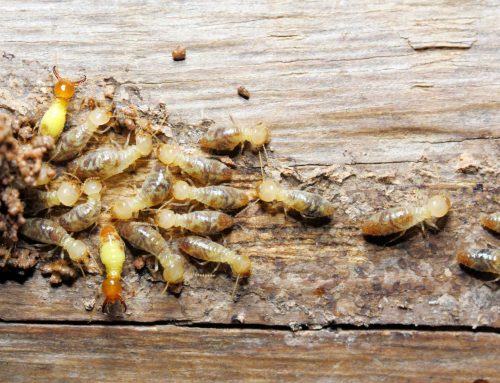
Understanding how smart maintenance habits can extend the siding’s lifespan and defeat rot allows homeowners to catch lower-course degradation early. Clear away dense leaf piles, dead garden foliage, and firewood stacks stored against exterior walls. Firewood piles block natural ventilation, trap dampness against siding, and serve as overwintering habitats for mice, carpenter ants, and wood-boring beetles seeking shelter from the cold.
Inspect bottom starter strips and weep holes along the perimeter base. Ensure weep gaps remain clear of dirt, nests, or excess paint so that any interior moisture condensation can drain freely out of the wall cavity.
Phase 5: Spotting Advanced Sub-Surface Damage Signs
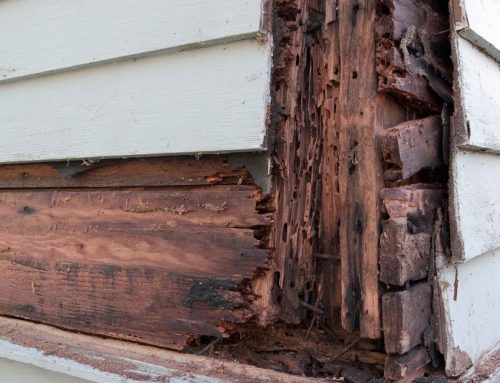
During your fall walk-around, it is vital to recognize early warning indicators that point to moisture intrusion occurring behind the siding panels. Catching sub-surface moisture issues before snow sets in prevents extensive framing repairs come spring thaw.
Pay close attention to these red flags:
- Rusting Fastener Heads: Rust spots bleeding through panel seams or paint coats indicate that moisture is reaching the underlying steel nails and sheathing.
- Soft, Spongy Trim Edges: Press firmly against lower corner boards and window sills with a screwdriver handle. Soft or yielding wood signals active decay inside the timber core.
- Interior Wall Tell-Tales: Check interior room walls directly opposite exterior siding joints for bubbling paint, peeling wallpaper, or musty basement odours.
The dangers of severe hidden wood rot behind exterior cladding can compromise structural wall studs and rim joists if left unchecked over a wet winter season. If you discover localized rot during your autumn inspection, remove the affected siding section immediately, replace rotted OSB sheathing, repair the damaged house wrap, and reseal the assembly before freezing weather settles in.
Total Winter Readiness for Your Canadian Home
A comprehensive fall siding inspection is a fast, high-return maintenance task that safeguards your largest financial asset. By clearing organic debris, inspecting fasteners, renewing perimeter sealants, and maintaining foundation clearances, you create an airtight, watertight barrier capable of withstanding the harshest Canadian winters.