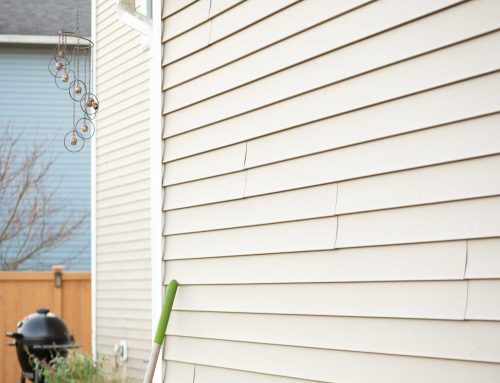
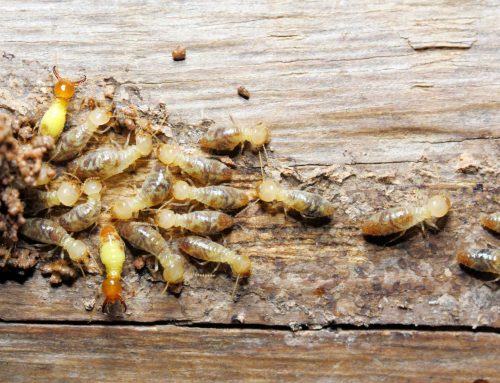
For Canadian homeowners, a beautiful exterior can sometimes hide a destructive structural secret. Siding serves as your building envelope’s outward face, projecting clean lines and architectural curb appeal. However, cladding is primarily designed as a rainscreen water shedder, not a 100% pressure-sealed barrier. Deep within the wall assembly—sandwiched between the back of your siding panels and the interior drywall—moisture can quietly accumulate unnoticed. Left unchecked through alternating seasonal shifts, trapped water converts solid structural sheathing into soft, crumbling rot.
Detecting sub-surface decay requires looking past superficial cosmetic appearances. Just as a routine checkup with your local family doctor catches subtle internal health issues before severe symptoms emerge, inspecting the hidden interfaces of your exterior wall assembly catches sub-surface moisture traps before structural wall studs collapse. Learning to identify subtle early warning signs of concealed framing decay allows Canadian homeowners to intervene before freezing winter temperatures turn minor moisture ingress into an expensive structural restoration project.
The Quick Edit
- The Physics of Trapped Moisture: Capillary action, failed flashing, and blocked weep channels trap liquid water against oriented strand board (OSB) wall sheathing.
- Subtle External Warning Indicators: Look for rusting fastener heads, soft trim bottoms, blistering paint, and persistent localized mildew streaks.
- Interior Clues: Musty basement odours, peeling drywall tape near window casings, and unexplained indoor humidity spikes often point straight to wall rot.
The Building Science of Hidden Wall Cavity Moisture
To understand how rot develops behind perfectly intact siding, one must examine the thermodynamics of Canadian wall assemblies. During warm summer months, rain drives through panel laps and trim gaps. Under intense solar heating, this moisture vaporizes and moves inward toward cool, air-conditioned interior spaces.
When autumn arrives, the vapour drive completely reverses. Warm, humid indoor air pushes outward through electrical outlets and unsealed drywall gaps toward cold exterior sheathing. When this warm air hits cold plywood or OSB sheathing behind the siding, it reaches its dew point and condenses into liquid water droplets.
If the wall assembly lacks a functional drainage gap or features a torn weather-resistive barrier (house wrap), this liquid moisture becomes trapped. Wood-decay fungi require four elements to thrive: wood fibre, temperatures between 10°C and 32°C, oxygen, and a continuous wood moisture content above twenty percent. Once moisture levels cross this critical threshold behind exterior cladding, wood-destroying spores germinate and begin digesting the cellulose fibres that give structural wall sheathing its mechanical strength.
The Seasonal Factor: How Summer Sun Prepares Winter Rot
A common misconception among homeowners is that wall decay occurs exclusively during wet spring thaws or freezing winter storms. In reality, warm weather often creates the initial entry pathways for cold-weather destruction. Understanding how summer sun damage can trigger winter siding failures reveals the hidden timeline of wall decay.
Protracted UV exposure bakes exterior caulking beads, causing sealants along window headers and corner trim to shrink, harden, and pull away from building materials. Simultaneously, intense thermal expansion forces siding panels to shift, stretching fastener openings and creating micro-gaps around trim interfaces.
When autumn rains begin, driven by strong seasonal winds, water enters these newly opened micro-cracks. Instead of draining harmlessly out through base channels, water clings to internal framing through capillary action. When sub-zero temperatures arrive, this trapped water freezes, expands, and tears internal house wrap membranes, allowing subsequent snowmelt directly into raw wood sheathing throughout the long winter months.
External Warning Signs: Reading the Exterior Elevation
Because siding panels cover wall sheathing, diagnosing hidden rot requires keen observation of secondary visual cues along exterior elevations.
Walk your home’s perimeter during a dry afternoon and inspect these key visual indicators:
- Rust Bleed along Fastener Lines: Stainless steel or hot-dipped galvanized nails should never rust under normal atmospheric conditions. If you spot reddish-brown rust stains bleeding through paint coats or weeping down panel seams, water is continuously pooling around nail shanks and soaking into underlying sheathing studs.
- Soft or Yielding Lower Trim Boards: Take a flat-head screwdriver and gently press the tip against lower corner boards, window sills, and skirt boards. If the wood feels spongy, yields under light thumb pressure, or flakes away in fibrous strings, dry rot fungi have already digested the internal wood structure.
- Persistent Localized Mould or Algae Patching: While light algae growth on north-facing walls is normal, dense green or black mould patches isolated to a single window corner or horizontal siding joint indicate a continuous water leak coming from behind the cladding.
- Distorted Architectural Lines: While homeowners love the beauty of board-and-batten siding profiles or clean horizontal lap lines, wavy, buckling, or pulling profiles often indicate that underlying sheathing has rotted away, causing structural nails to lose their grip in the wall framing.
Internal Clues: What Your Living Space Is Telling You
Wall rot frequently manifests inside the home long before exterior siding shows obvious physical failure. Water trapped inside wall cavities eventually travels inward toward interior finishes, leaving distinct diagnostic footprints across room walls and basements.
Inspect interior perimeter rooms directly behind suspicious exterior wall sections. Look for subtle paint blistering, bubbling drywall paper, or faint yellow water rings beneath window sills. In severe cases, interior baseboards may pull away from drywall, or nail heads may pop through taping lines due to swelling wall studs.
Air quality provides another reliable indicator. If a specific perimeter room or basement wall corner exhibits a persistent, earthy, or musty odour that resists deep cleaning, mould spores are actively growing inside the wall cavity. Unexplained winter humidity spikes—where interior room windows fog up despite running a central dehumidifier—also suggest that wet wall insulation is continuously off-gassing moisture into your living spaces.
Diagnostic Techniques: Verifying Sub-Surface Moisture Levels
If you suspect hidden decay behind your cladding, executing a structured fall siding inspection and maintenance routine should include non-destructive moisture verification before removing exterior panels.
Professional home inspectors and building science technicians utilize dual-pin and pinless moisture meters to measure wood moisture content (WMC) through cladding materials. A moisture reading below fifteen percent indicates a healthy dry assembly. Readings between fifteen and nineteen percent signal elevated moisture risk, while readings exceeding twenty percent indicate active fungal decay conditions.
Infrared thermal imaging cameras offer another non-invasive diagnostic tool. Because wet insulation and rotted sheathing hold heat differently than dry building materials, thermal cameras display wet wall sections as cold blue thermal anomalies during winter heating cycles.
Remediation Protocols: Restoring Wall Assembly Integrity
Discovering hidden rot behind your exterior cladding requires immediate, systematic remediation to stop decay from spreading to primary structural rim joists and floor trusses.
Remediation requires a complete multi-step restoration protocol:
- Selective Panel Removal: Carefully unclip and remove siding panels across and at least two feet beyond the affected damp wall area.
- Excavating Rotted Sheathing: Cut away soft, decayed OSB or plywood sheathing back to sound, dry framing studs. Treat intact structural studs with borate-based wood preservatives to kill dormant fungal spores.
- Insulation Replacement: Remove wet fibreglass or cellulose insulation batts, which lose all thermal R-value when saturated and harbour persistent mould colonies.
- Rebuilding the Drainage Plane: Install fresh sound sheathing, fit high-R hydrophobic insulation, and apply new weather-resistive house wrap, ensuring all seams overlap in shingle fashion (top over bottom).
- Flashing and Cladding Re-installation: Reinstall original or replacement siding, integrating self-adhering flashing tape around window perimeters and maintaining proper weep gaps along lower courses.
When dealing with extensive wall damage, understanding the step-by-step siding installation process ensures that replacement work restores full weather-tight integrity without creating new moisture traps.
Protecting Structural Investment Through Early Detection
Hidden rot behind exterior siding is a manageable building threat when caught early. By recognizing subtle external warning signs, monitoring interior air quality, and acting promptly on moisture anomalies, Canadian homeowners can eliminate hidden wall cavity decay, protect their home’s structural framing, and ensure lasting winter comfort.