Protecting Your Home’s Sleek and Durable Armour
Custom aluminum siding is chosen for its sharp, modern look and its promise of long-lasting durability. It is a fantastic investment in a home’s curb appeal and its protection against the harsh Canadian climate. But how does one ensure it looks just as good in year ten as it did on day one? While aluminum siding is famously low-maintenance, it is not “no-maintenance.” A simple, proactive care routine is the key to preserving its colour, finish, and protective qualities for decades. This includes paying close attention to how it integrates with your windows and doors. This guide will provide a complete walkthrough on how to maintain your custom aluminum siding, covering proper cleaning, essential inspections, and simple preventative tips to keep it performing and looking its best for years to come.
The Gentle Cleanse: Proper Cleaning Methods for Aluminum Siding
The key to cleaning aluminum siding is a gentle approach. This material typically has a durable, baked-on finish that provides its colour and protective qualities. Using harsh chemicals, abrasive scrubbers, or a high-pressure power washer can strip this finish. This can lead to premature fading, a dull, chalky appearance, and a reduction in its protective capabilities. The goal is always to clean the accumulated dirt and grime, not the colour itself. A gentle, annual cleaning is usually all that is needed to keep the siding looking fresh and vibrant.
A simple, safe, and effective cleaning solution can be made with common household ingredients. Mix a mild, biodegradable detergent, such as a gentle car wash soap, into a bucket of warm water. For areas with mildew or algae, which often appear as green or black stains in shaded, damp areas, adding one part white vinegar to four parts water in the solution can be very effective. This natural solution is tough on organic growth but will not harm the siding’s finish or the landscaping below, making it an ideal choice for regular maintenance.
The Step-by-Step Cleaning Process
To begin the cleaning process, start by gently rinsing a section of the siding with a garden hose. This will remove any loose dirt, dust, and cobwebs. Working in manageable sections, perhaps one wall at a time, will ensure the cleaning solution does not dry on the surface before you can rinse it. It is also best to work from the bottom up when applying the cleaning solution. This technique prevents streaking, as dirty runoff will not run down over a dry, soiled surface, which can cause stubborn marks.
Apply the cleaning solution using a soft-bristled brush with a long, extendable handle or a large, soft car-washing sponge. Allow the solution to sit on the surface for a few minutes to break down the grime, but do not let it dry. Gently scrub any stubborn spots as needed. Once the section is clean, rinse it thoroughly from the top down, ensuring all soap residue is washed away. This simple method will safely restore the look of your siding without causing any damage to its protective finish.
The Annual Walk-Around: Your Essential Inspection Routine
An annual inspection is a five-minute investment that can prevent costly repairs down the road. It is best to perform this check-up in the spring after the snow has melted and the siding is clean. Walk the perimeter of your home and look closely at the overall condition of the panels. Check for any chalking or fading. You can do this by running a hand over the surface; if a powdery residue comes off, it indicates the finish is beginning to age. Also, look for any physical damage like dents, dings, or scratches from hail, ladders, or stray baseballs.
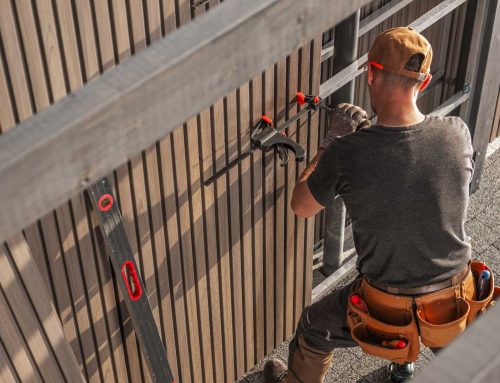
Pay special attention to the critical zones where the siding meets your windows and doors. These seams are the most vulnerable points for water to get in. Routine inspections of siding edges around windows and doors to prevent water intrusion are crucial. Look closely at the caulking in these areas. Is it cracked, peeling, or missing entirely? A failed seal here is a direct path for water to get behind the siding. This can lead to rot in your wall structure, mould growth, and serious damage that is hidden from view until it becomes a major problem.
Smart Prevention: Keeping Your Siding Pristine
Simple preventative measures can go a long way in keeping your siding looking great. Thoughtful landscaping is one of the easiest and most effective strategies. Keep shrubs, trees, and other plants trimmed back at least a foot from the siding. This allows for proper air circulation, which helps the siding dry out completely after rainfall and prevents the growth of mildew and algae. This simple buffer also prevents branches from scratching or scuffing the siding’s finish during high winds, preserving its appearance.
Proper water management is another key factor. Ensure your gutters are clean and free of debris. Clogged gutters can cause water to overflow and cascade down your siding, leading to persistent staining and moisture issues. Also, check that your downspouts are directing water well away from your home’s foundation and the base of your walls. Constant splashing from a poorly placed downspout can damage the bottom row of siding over time. Being mindful with tools like ladders and lawnmowers can also prevent accidental dents and scratches.
Addressing Minor Blemishes: Simple DIY Fixes
Even with the best care, minor blemishes can happen. The good news is that many small issues can be addressed with simple DIY fixes. For small scratches that have not deeply gouged the metal, a matching touch-up paint from the manufacturer can be used. This is important not just for cosmetic reasons, but also to prevent the exposed aluminum from oxidizing. The key is to clean the area thoroughly first and use a very small artist’s brush for a precise application.
For very small, shallow dents, sometimes a DIY auto body dent puller kit that uses suction can work, but this should be done with extreme caution to avoid making the problem worse. It is important to know that investing in good-quality siding from the start can reduce the likelihood of these issues. For larger or creased dents, or for any repair you are not completely comfortable with, calling a professional is always the best option. A professional has the tools and experience to repair the panel without causing further damage.
Long-Lasting Beauty Through Simple Care
The three pillars of aluminum siding maintenance are gentle cleaning, thorough annual inspections, and smart preventative measures. This simple, consistent routine is all that is needed to protect your investment. A well-cared-for exterior does more than just look good. Remember that a well-maintained siding can protect you better from the elements and contribute to the overall health of your home. The performance of professionally installed siding is directly linked to its upkeep. By following these straightforward steps, you can ensure your siding remains a source of pride and protection for decades to come. This maintenance will also help boost the energy efficiency of your home by ensuring the building envelope is secure.